This was the fun part. Fun as in "not particularily, but challenging, frustrating and it gave me something to think about while I was up at 2 AM soothing a screaming child".
That kind of fun
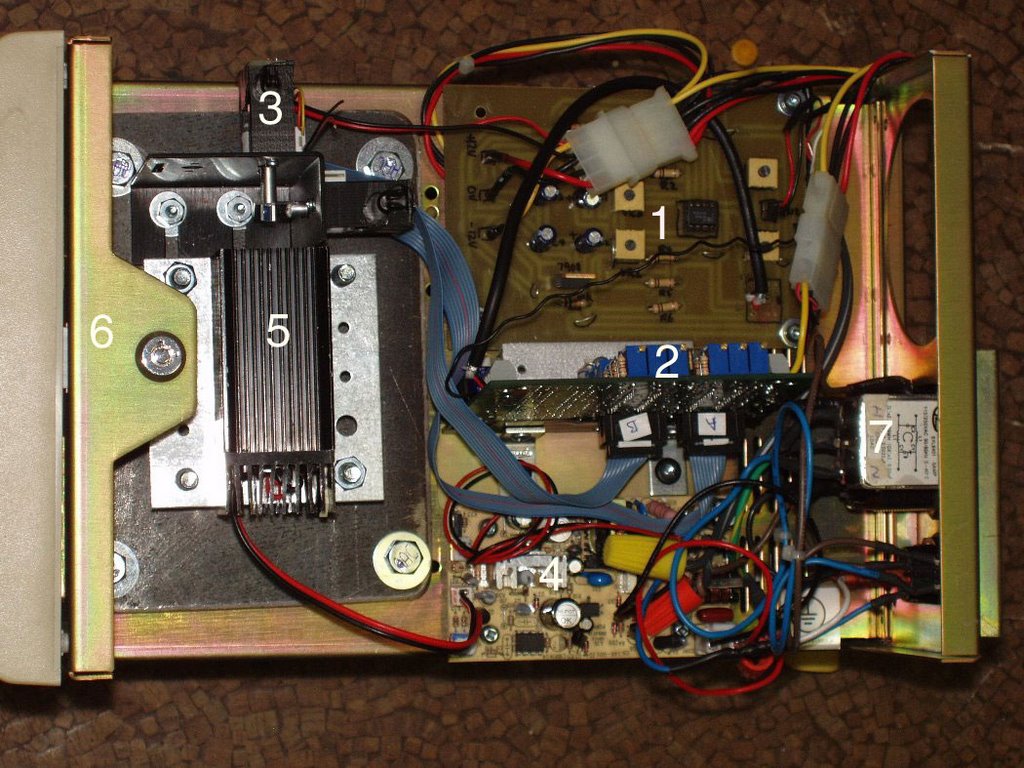
1. DC coupling: This thing is analog! How retro can you get? DC coupling does something to the analog input siganl so it can drive the scanners. I did a lot of work at UBC on signal theory and electronic measurement, but I still don't get what this actually does. Had to build it myself though - from designing the circuit to etching the board to soldering the parts. Worked first time too.
2. Scanner Amplifier: Takes the input from the signal and amplifies it to drive the scanners. I shorted this out when I thought the heat sink was grounded. It still sort of works, but I may have to send it in to get it checked. My bad.
3. Scanners: Your Head Asplode (Joke). These are basically small mirrors mounted on electric motors that oscillate in sync with the signal. One for the X axis and on for the Y axis. Think of it as an etch-a-sketch with light and that's about it.
4. Laser Power Circuit: power to the laser. Nuff Said.
5. Laser: 532nm 30mW DPSS TTL laser to be specific. Hella bright. And green. And dangerous. Still won't cut a spy in half, or even burn a hole in a paper cup, but it's still cool.
6. Case: This was really the hardest part. Where to put it all. I've got a lot of junque electronics around so finding a case was not a problem. Finding a case with 120V power socket, plenty of space, fans and heavy enough not to vibrate too much was the problem. I thought it would be cool to put in all in a translucent green AGFA scanner case, but it wouldn't fit. I finally settled on this 7 bay SCSI CDROM tower from our old library. I don't think anyone would really miss it. I gutted the CD drives (quad speed - how quaint) and power supplies and with a little bit of fudging all fit in. I also mounted the laser and scanners on a 1 kg metal plate with some rubber grommets for vibration control. I'd love to be able to stuff the Amiga board in and run an LCD panel on the outside.
Next version.
7. Power connector: lots of switches - one for the laser (key lock controlled), one for the mains, fuse and breakers. And of course, I can't find the key.


No comments:
Post a Comment